
Build Your Own Raspberry Pi Ethereum Full Node [Go Client]
Click Here for installing the Python client

LAST UPDATED FEBRUARY 5, 2016
Disclaimer: I cannot guarantee these steps will work 100% of the time. Like all DIY tutorials they make assumptions about things and are subject to external libraries and software being updated or changed. I periodically test and update these steps for changes or additions, but I can't guarantee that some troubleshooting won't be needed to get your node up and running.
PRELIMINARIES
This tutorial is to install Ethereum Geth v1.3.3 (or 1.3.x if later versions are saved in the 1.3.3 branch) on a Raspberry Pi 2. Options will be given to store the blockchain data on the microSD card or on an external USB device. EthDev maintains three Ethereum clients: Eth (written in C++), Pyeth (written in Python), and Geth (written in Go). This tutorial is to install Geth, the Go client. Ethereum is extremely cutting edge and under rapid development, so expect a bumpy ride and some problems if you dive in at this point.
If you run into any Raspberry Pi problems while going through these steps, the Raspberry Pi Docs are a good source for help:
http://www.raspberrypi.org/documentation/
ALTERNATIVES
EthDev has a prebuilt OS image for the Raspberry Pi using ArchLinux. They also have DIY steps for the ArchLinux OS. It comes with both Geth (the Go client) and Eth (the C++ client) preinstalled. You can also download and run pre-built ARM binaries of Geth from here: https://build.ethdev.com/builds/ARM%20Go%20develop%20branch/geth-ARM-latest.tar.bz2 but they are builds from the latest development branch so are not guaranteed to be stable. But they will be up-to-date!
EthEmbedded provides ARM builds for Ethereum for microcomputers such as Raspberry Pi, Odroid, and BeagleBone Black. They have Eth and Geth Install Scripts on github for the Raspberry Pi, the Geth script requiring an upgrade to Debian Stretch rather than using the officially supported Debian Wheezy or Jessie.
FULL STEPS
- Assembling the Raspberry Pi
- Download and Install Raspbian on the microSD card
- Configuring Raspbian
- Configuring the USB drive and setting to automount on boot (optional)
- Configure networking on the Raspberry Pi
- Downloading and installing dependencies
- Downloading and installing Geth
- Configure and run Geth
- Configure home network to sync up with the Ethereum network
EQUIPMENT FOR NODE
- Raspberry Pi 2
- Case fitting Raspberry Pi B+ form
- Power supply (micro USB, 5V, at least 2A)
- USB wifi adapter -or- Ethernet cable for direct connect to your router
- 8GB (or larger, especially if storing the blockchain on it) MicroSD card (class 10)
- (OPTIONAL) USB Flash drive or USB external hard drive
As of February 2016 the blockchain and data takes up around 7GB of space and is growing fast, so while an external storage device is not needed yet it may be a good idea to use one anyway.
PURCHASE OPTIONS
You can find what is needed to build an Ethereum raspnode for less than $100.
The CanaKit Raspberry Pi Starter Kit costs $70 (plus tax and shipping) and comes with everything you need minus the USB drive and Ethernet cable (if you wish to cable directly to your router).
With enough exploring, reasonably priced 128GB USB drives can be found, some in the $35 to $40 range. Some 500GB external HDs can be found in the $50 to $60 range.
EQUIPMENT FOR SETUP
- HDMI cable
- Monitor with HDMI in or adapters to convert HDMI to your monitor
- USB keyboard
- Router and a connection to the Internet
- Separate PC which needs to be able to read a microSD card
ASSEMBLY
How to assemble your Raspberry Pi will depend on the case purchased. Once assembled, plug in your USB stick (optional), HDMI cable to your monitor, USB keyboard, and either your USB Wifi adapter or an Ethernet cable going to your router.
The device will automatically power on once you plug in the micro USB power cable.
INSTALLING THE RASPBIAN OS
If your Raspberry Pi came with a microSD card preloaded with NOOBS you can insert the microSD card into your Raspberry Pi, plug in your power cable and it will walk you through your setup. Make sure you select Raspbian as your OS choice, which should be the first on the list. It will take a few minutes to install. Once that is finished, reboot and jump to Raspbian config options.
If you have a brand new microSD card, you will need to download a Raspbian image to your PC and image your microSD card. This tutorial will assume you are using a PC running Microsoft Windows. Instructions for imaging using Mac or Linux can be found in the Raspberry Pi documents:
http://www.raspberrypi.org/documentation/installation/installing-images/README.md
You can find the latest on the Raspberry Pi downloads page:
http://www.raspberrypi.org/downloads/
Or directly download the latest here:
http://downloads.raspberrypi.org/raspbian_latest
Once downloaded, unzip the file. If you don't have an application installed for unzipping files, you can use the open source 7zip:
The unzipped folder will have a large .img file. In order to put this image on your microSD card we'll need to use the open source Win32DiskImager which can be found on sourceforge:
http://sourceforge.net/projects/win32diskimager/
Or directly download the latest here:
http://sourceforge.net/projects/win32diskimager/files/latest/download
Once downloaded run the installer, this will install Win32DiskImager.
Insert your microSD card into your PC. Launch Win32DiskImager. Select the Raspbian .img file as the 'image file' and select your microSD card as your 'device'. Make sure what is selected is your microSD card and nothing else, especially your hard drive. Click 'write'. This will take a few minutes.
Once finished, eject your microSD card. Insert your microSD card into your Raspberry Pi and plug in the power cable and wait while it boots up.
RASPBIAN CONFIG OPTIONS
When you first boot Raspbian you will be prompted with the raspi-config menu shown below:
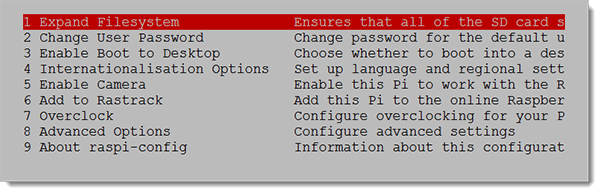
If you used NOOBS to install Raspbian your file system will already be expanded to fill your full microSD card. However if you installed a Raspbian image you'll need to expand it now.
Select “1 Expand File System" which will expand the file system to fill the card.
OPTIONAL
You can run your OS 'headless' and we can allocate a little more RAM to the CPU.
Select "8 Advanced Options" then select "Memory Split"
Change 64 to 16
Select "OK"
If you want to be able to SSH into your Raspnode, you can enable the SSH server here.
Select "8 Advanced Options" then select "SSH"
Select "Enable"
Change hostname. The default hostname is set to "raspberry". We'll change ours to "raspnode" and the rest of the tutorial will assume this. If you leave yours as "raspberry" or change it to something else, anytime you see the hostname mentioned, use that instead of "raspnode".
Select "8 Advanced Options" then select "Hostname"
Edit the hostname to “raspnode" without quotes (or to your desired hostname)
Select "OK"
Here you can also change the default user (which is "pi") and password (which is "raspberry"). We'll leave these as is for the tutorial. If you change your username, make sure to use that instead of "pi" when it shows up in this tutorial.
You can overclock your Raspberry Pi in order to give it a little more processing power. This may make the initial verification of the blockchain quicker, but is not needed for normal full node operations.
Select "7 Overclock"
Choose the desired level of overclocking
Select "OK"
To set your timezone:
Select "4 Internationalisation Options"
Select "Change Timezone"
Go through the selection process to select your timezone, then select "OK"
Once done, select "Finished" and your Raspberry Pi will reboot.
When you get the "login" prompt, enter your username "pi" and it will prompt you for your password. Enter your password (which won't show up) and hit <enter> to log in (the password will be "raspberry" if you didn't change it in the raspi-config).
EDITING FILES
We'll be using the command line to edit files. If you are not familiar with a command line this may be a little tricky. Raspbian comes with a few editors. Nano is a relatively friendly editor and this tutorial will use that, but Raspbian also has vi for users who prefer it and can be used instead. If you have not used vi before, you should stick with nano.
For those not familiar with Linux, some actions we take will require root privileges. We get that by using the command “sudo" before our desired command. This will only work if you are logged in as a user with sudo rights, which the default Raspbian user (“pi" in our case) has. Sudo can be set to require a password, but the default Raspbian user should be set to not need one.
You may want to change the default keyboard layout. Edit /etc/default/keyboard
pi@raspnode~$ sudo nano /etc/default/keyboardChange the line
XKBLAYOUT="gb"to equal your desired country code, so for US keyboard layout change it to
XKBLAYOUT="us"Then save and exit. Reboot to have it take effect. Reboot with
pi@raspnode~$ sudo shutdown -r nowCONFIGURE USB AND SET AUTOMOUNT (OPTIONAL)
If you aren't using any external storage you can skip this section and go to networking.
Make sure your USB stick is empty and using a file format that works natively with Linux (e.g. not NTFS). FAT32 is a good option. You can do this by plugging your USB stick into your Windows PC and checking it's properties. If it isn't empty, format it as FAT32. Here you can also change the label. Make a note of the label, it will be helpful later (but not necessary).
Windows may not give the option to format a drive that is very large as FAT32, in which case you will need to use some third party software, or format it in Linux. Also, note that Raspbian will most likely see FAT32 as VFAT which is what we'll see below.
Create a directory that will act as a mount point for the USB stick, we'll call it ethData and put it in the home directory (full path will be /home/pi/ethData/:
pi@raspnode~$ mkdir ~/ethDataPlug your USB stick into your Raspberry Pi and wait a few seconds. In order to see where it is located, issue the command:
pi@raspnode~$ sudo blkidYou can issue the blkid command without sudo, but if you run it without root privileges you won't get any information back. What you should see is a few lines that look something like this:
/dev/mmcblk0p1: LABEL="root" UUID="1460456c-eadd-49a9-e2ab-a0fe18df0d3a" TYPE="ext4"
Which are specific to your OS. What you are looking for is a line like:
/dev/sda1: LABEL="<your usb label>" UUID="<some id>" TYPE="vfat"
This is where knowing your label can help. The type should be “vfat" and you are looking to see what the /dev/sdxx is (it could be sda1, sdb1, or something similar, but most probably sda1). Write that down. You don't actually need the label or uuid written down, just the location.
In order to tell your Raspberry Pi to mount your USB stick automatically so that anything we put in the ethData directory will be going onto the USB and vice versa we need to edit the /etc/fstab file.
pi@raspnode~$ sudo nano /etc/fstabIt should have a few lines of information, at the end of the file add this, all as one line, starting with the location of your USB drive that you wrote down. If it is /dev/sda1, then what you add would be this:
/dev/sda1 /home/pi/ethData vfat uid=pi,gid=pi,umask=0022,sync,auto,nosuid,rw,nouser 0 0If you changed your username to something else, replace “pi" with that username above in all areas it shows up. There are no spaces in that line, only a single tab between each chunk of data. There are other options that you could use if you wanted more or less restrictions on your drive, but this will work. You should only alter this setup if you know what you are doing. Basically this will automatically mount the USB drive on boot to our desired location, allow the pi (or substituted user) to read and write data to the drive, and a few other things beyond the scope of this tutorial.
Save the file and exit. Reboot your Raspberry Pi:
pi@raspnode ~ $ sudo shutdown -r nowNETWORKING ON THE RASPBERRY PI
If you are using an Ethernet cable and plugging directly into your router and DHCP is turned on, you can plug that in and you should have access to the Internet. You can check by pinging out:
pi@raspnode~$ ping google.comIf you start to see pings you are good. Hit <ctrl> + c to stop the pings. If you are using a wifi adapter and have a password set for your router, there are a few more steps to take. Setting up and troubleshooting wifi on the Raspberry Pi is beyond the scope of this tutorial, so if the basic setup shown here doesn't work, you can reference the Raspberry Pi documentation for help:
http://www.raspberrypi.org/documentation/configuration/wireless/wireless-cli.md
To setup your wifi, edit the file /etc/wpa_supplicant/wpa_supplicant.conf:
pi@raspnode~$ sudo nano /etc/wpa_supplicant/wpa_supplicant.confAdd this to the bottom of the file:
network={
    ssid="<your wifi ssid here>"
    psk="<your wifi password here>"
}
For example, if your wifi network is named myHomeWifi and your wifi password is mySuperSecret then wpa_supplicant.conf should look something like:
ctrl_interface=DIR=/var/run/wpa_supplicant GROUP=netdev
update_config=1

network={
    ssid="myHomeWifi"
    psk="mySuperSecret"
}
Then restart your wifi interface:
pi@raspnode~$ sudo ifdown wlan0
pi@raspnode~$ sudo ifup wlan0
If you need to set a static IP, that is currently out of the scope of this tutorial.
DOWNLOADING ETHEREUM GETH DEPENDENCIES
In order to install Geth we need to install a few tools and software packages. First let's make sure everything is up to date and update it if it isn't:
pi@raspnode~$ sudo apt-get update
pi@raspnode~$ sudo apt-get upgrade -y
We need to install some dependencies, running this will download what is needed:
pi@raspnode~$ sudo apt-get install libgmp3-dev -yThat should take just a couple minutes. Next we need to download and install version 1.4 of the Go programming language. There isn't an official ARM release of Go 1.4, but thankfully Dave Cheney has done that work for the community. First lets make a directory to do our building in:
pi@raspnode~$ mkdir ~/bin
pi@raspnode~$ cd ~/bin
Then we'll download the Go 1.4 for ARMv7 tarball, extract it, and add it to our PATH variable:
pi@raspnode~/bin$ wget http://dave.cheney.net/paste/go1.4.linux-arm~armv7-1.tar.gz

            pi@raspnode~/bin$ tar -xzvf go1.4.linux-arm~armv7-1.tar.gz

            pi@raspnode~/bin$ export PATH=$PATH:/home/pi/bin/go/bin

            pi@raspnode~/bin$ export GOROOT=/home/pi/bin/go
This i a temporary setup for using Go, as we won't need it after we build Geth.
INSTALLING GETH
Download the Geth v1.3.3 source code from github and build it (despite the branch name this may actually download a higher version depending on how frequently EthDev creates branches, if you wish to get the most recent version which may or may not be stable remove the '-b release/1.3.3' arguments):
pi@raspnode~/bin$ git clone -b release/1.3.3 https://github.com/ethereum/go-ethereum.git

            pi@raspnode~/bin$ cd go-ethereum/

            pi@raspnode~/bin/go-ethereum$ make geth

            pi@raspnode~/bin/go-ethereum$ sudo cp build/bin/geth /usr/local/bin/
Building Geth should only take a couple minutes.
SETUP AND RUN ETHEREUM GETH
You don't need to create an account to run Geth, but we will do it anyway. An account consists of an encrypted private key and your corresponding public key/address. If you are using external storage you must tell Geth where your data directory is, otherwise it assumes it to be ~/.ethereum:
pi@raspnode~/bin$ cd ~/

            pi@raspnode~$ geth --datadir /home/pi/ethData account new
You will be asked to create a passphrase and re-enter it. This passphrase is used to encrypt your private key, you must remember this passphrase if you ever wish to use this account. You can create as many accounts as you wish, but if you forget your passphrase for an account that has ether, you will have lost it. Here is the command if you aren't using external storage:
pi@raspnode~$ geth account newRun Geth, using this command if you have external storage:
pi@raspnode~$ geth --datadir /home/pi/ethData --ipcdisable --autodag consoleOr this command if not using external storage:
pi@raspnode~$ geth --autodag consoleFor external data, the --ipcdisable is needed if the external file system is FAT32. If you wish to use the ipc console you still can but replace "--ipcdisable" with "--ipcpath /some/location/on/microsd/geth.ipc".
This command starts Geth and gives you a command line interface to use. After some initial setup you should see a message like '...Block synchronisation started' followed by messages like '...imported 256 block(s)...'. While using the command line interface you can check the status with:
> eth.syncingWhich will show you your current block number, and the highest block number being reported by your peers. You can also check the highest block using web blockchain explorers like etherchain.
If you would rather run Geth in the background instead of using the console and not see messages, then use this command if using external storage:
pi@raspnode~$ geth --datadir /home/pi/ethData --autodag --verbosity 0 &Or this one if not using external storage:
pi@raspnode~$ geth --autodag --verbosity 0 &A full list of Geth commands can be found on the go-ethereum wiki.
To stop Geth from the console, issue:
> exitIf you are running Geth in the background as a daemon (using & at the end) then you'll have to bring it to the foreground with 'fg' and kill it with <ctrl + c>.
As of November 3, 2015 the blockchain was around 3.5GB and it took roughly 24 hours to download, expect 72 or more hours as of February 2016. For most of the time while catching up, block imports will come pretty consistently, but occasionally the imports will stop, sometimes stopping for a couple hours, before resuming later. You may choose to stop and restart your node during these times. The blockchain data can get corrupted while you are trying to sync, if that happens then when you try to run Geth it will spew forth a bunch of messages and exit. The fix is to delete the blockchain data and start over. The blockchain data is in the 'chaindata' directory in your Ethereum directory (~/ethData or ~/.ethereum). Because of this it is best to download the blockchain on another computer and transfer it over, by copying the 'chaindata' folder. It took less than 45 minutes to sync with the network on my server.
When Geth is syncing the blockchain the CPU will be pegged and RAM usage mostly floats between 20% and 40%. Once the blockchain is caught up, Geth will jump around between 10% and 100% of one core, and RAM usage falls to around 11%.
CONFIGURE HOME NETWORK TO SYNC WITH THE ETHEREUM NETWORK
The Ethereum network uses port 30303. Geth will use UPnP to try and open that port up on your router for you. If your router does not support UPnP you may have to forward the port manually. To do that you will need to get your raspnode's local IP address with:
pi@raspnode~$ ifconfigIf you are cabled into your router directly the IP address will be under "eth0", if you are on wifi it will be under "wlan0".